
Experiencing a power outage can already be inconvenient, but it becomes especially noticeable when accompanied by the repetitive chirp of a smoke alarm. This alert is designed to catch your attention and ensure that your home safety devices remain functional, even without electricity. If you are currently hearing this noise, it’s important to remember that it is usually a standard notification rather than an emergency alarm.
Understanding how to stop smoke alarm beeping during power outage events can help you maintain a calm and comfortable home environment while ensuring your devices continue to provide reliable protection. Most modern alarms switch seamlessly to backup battery power during outages, but this transition sometimes triggers the chirp. By following a few careful steps, you can silence the sound effectively, verify that your alarm is working correctly, and restore peace to your home without stress or complication.
What “Stop Smoke Alarm Beeping During Power Outage” Means
When your smoke alarm starts chirping during a power outage, it is signaling a temporary change in its operating condition. Most alarms are hardwired into your home’s electrical system but include a battery backup. The beeping often indicates that the unit has switched to its secondary power source or that the battery may need replacement.
This chirping serves as a status alert rather than an emergency alarm. It confirms the unit is still active, monitoring your environment, and functioning properly. Understanding this function allows homeowners to respond calmly and appropriately, using the alarm as intended rather than reacting with unnecessary urgency.
Preparing to Restore Peace and Quiet
Before addressing the chirping, it’s helpful to prepare thoughtfully. Gather a flashlight or headlamp so you can see clearly in the dark. Wear stable, non-slip shoes and position a step ladder safely if needed. Taking a moment to assess the situation reduces frustration and ensures that your approach is both calm and methodical.
By approaching the alarm with a clear plan, you can resolve the chirping quickly while maintaining safe practices. This preparation ensures that the process of stopping the smoke alarm beeping during a power outage is simple, manageable, and stress-free, allowing you to maintain both safety and comfort in your home.

Importance of Addressing the Beeping
Paying attention to a smoke alarm chirp during a power outage is an important aspect of home maintenance. Even though the unit is functioning as designed, addressing the alert ensures that the device is fully operational and capable of providing continuous protection.
Ignoring the chirping or temporarily removing the alarm can leave your home without monitoring for extended periods. By responding to the signal correctly, you confirm that your smoke alarm is ready to perform when needed, providing better protection for everyone in your household. This proactive approach balances safety with convenience, reinforcing peace of mind.
Common Situations That Trigger Beeping
Certain circumstances commonly lead to smoke alarms chirping during a power outage. The most frequent is a complete loss of electricity, causing the device to rely solely on its battery.
Other situations include temporary voltage fluctuations or “brownouts,” which can confuse the unit’s sensors. Occasionally, alarms may chirp briefly when power is restored as the device resets itself. Understanding these contexts helps homeowners realize that the beeping is a standard, predictable response rather than an indication of malfunction. Awareness of these scenarios promotes calm and confident handling of your home safety devices.

Tools and Materials You’ll Need
- Sturdy Step Ladder
- Flashlight or Headlamp
- Fresh 9-Volt or AA Batteries (depending on unit type)
- Soft Cloth or Vacuum Attachment for dust removal
- Safety Glasses
- Non-Slip Shoes
These items help you work safely and effectively while addressing the noise from your smoke alarm.
Step-by-Step Guide: How to Stop Smoke Alarm Beeping During Power Outage
Step 1: Identify the Specific Unit
Simple Precaution: Ensure your flashlight is on, your shoes are non-slip, and you move carefully through the darkened home. Avoid rushing to prevent tripping hazards or accidental contact with furniture.
Step Explanation: Walk through your home and listen carefully to locate the specific alarm emitting the chirp. In homes with interconnected alarms, only the initiating unit will emit the sound. Look for visual cues, such as a flashing red or green LED, which usually accompanies the chirp. Identifying the correct unit prevents unnecessary handling of other devices and focuses your efforts. Once located, shine your flashlight on the alarm to verify its status. This targeted approach ensures safer, more efficient resolution.
Step 2: Utilize the Silence or “Hush” Button
Simple Precaution: Place your step ladder securely on a flat, dry surface. Position your flashlight so it illuminates the alarm clearly without causing glare. Avoid overreaching when pressing the button.

Step Explanation: Many modern smoke alarms include a built-in “Silence” or “Hush” button for temporary interruptions. Pressing and holding this button for a few seconds can stop the chirping immediately. This desensitizes the unit for about 8–10 minutes, allowing you time to address the underlying issue. This method does not require opening the alarm or removing it from the ceiling and is an effective, non-invasive first step to stop the beeping. It’s a safe way to manage the alert while maintaining proper monitoring function.
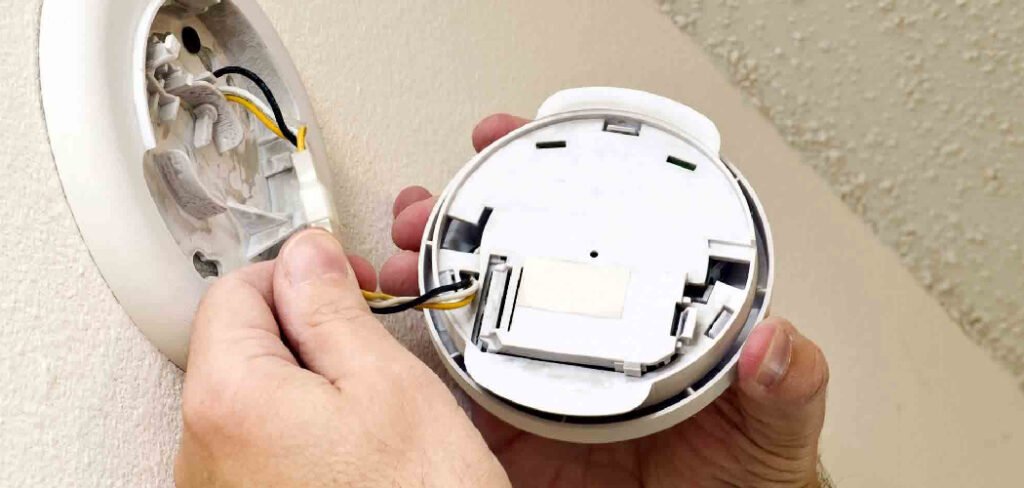
Step 3: Replace the Backup Battery
Simple Precaution: Ensure your hands are dry and the ladder is secure. Open the battery compartment gently without forcing the door. Keep the old battery separate to avoid reinstallation errors.
Step Explanation: If the chirping continues, the backup battery is likely low. Open the compartment, remove the old battery, and inspect the terminals for dust or corrosion. Insert a fresh battery, following the positive and negative alignment indicated inside the compartment. Proper installation ensures reliable operation during power interruptions. Once installed, the alarm may chirp once to confirm power has been restored. This step is critical for maintaining uninterrupted monitoring and reducing potential risks associated with battery depletion during outages.
Step 4: Clean the Sensor Chamber
Simple Precaution: Wear safety glasses to protect your eyes from falling dust. Use a soft cloth or vacuum brush attachment, avoiding moisture near the unit.
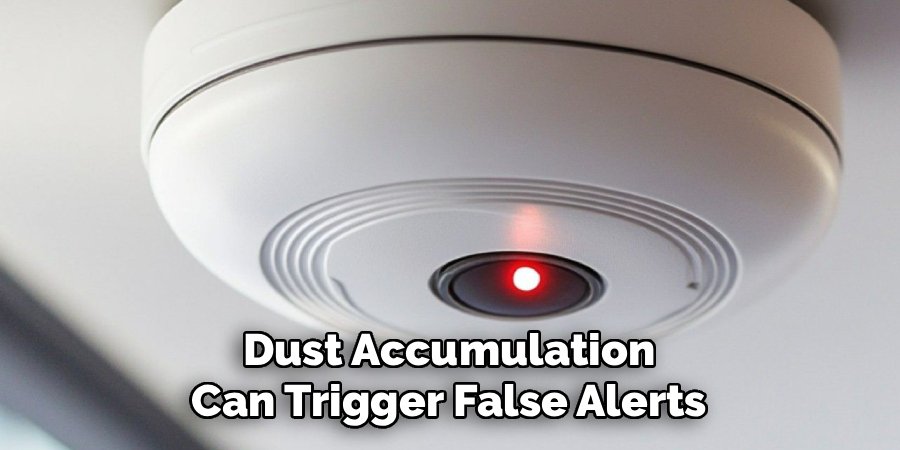
Step Explanation: Dust accumulation can trigger false alerts. Power outages or drafts may stir particles that settle inside the sensing chamber, causing persistent chirping. Gently clean the vents and sensor area with a vacuum or compressed air. Keeping the chamber free of dust ensures the sensor can accurately detect smoke, maintaining proper functionality. Regular maintenance reduces future disturbances and contributes to overall improved safety by ensuring the device is responsive and correctly monitoring the air in your home.
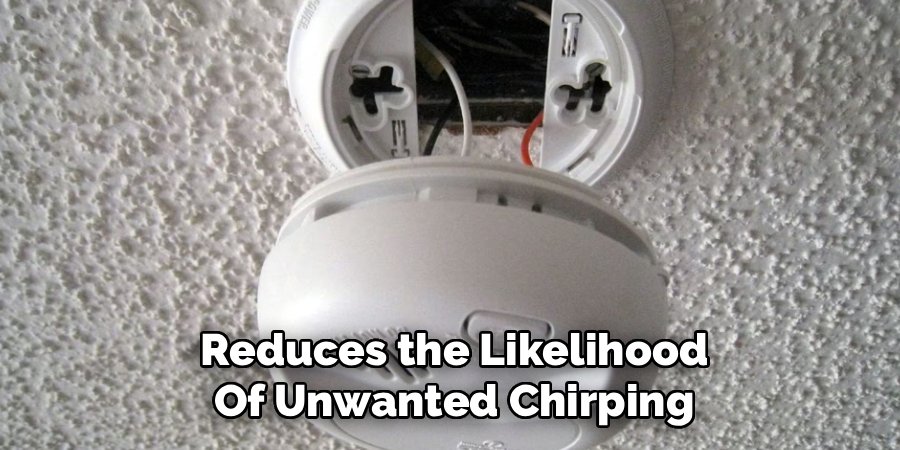
Step 5: Perform a Hard Reset
Simple Precaution: Securely hold the unit while disconnecting it from any wiring harness. Remove the battery carefully and avoid pulling wires.
Step Explanation: If replacing the battery and cleaning do not stop the chirp, the unit may retain a residual charge. Perform a hard reset by disconnecting the alarm from the power source and removing the battery. Press and hold the “Test/Silence” button for 15–20 seconds to discharge remaining energy. Reinstall the battery and reconnect the wiring. This process clears minor glitches and restores the alarm to default monitoring mode. Hard resets are a reliable way to refresh the system and ensure it functions correctly during and after outages.
Step 6: Check the Circuit Breaker
Simple Precaution: Stand on a dry surface and use a flashlight to inspect the panel. Avoid touching the panel with wet hands and confirm the area is safe.
Step Explanation: Sometimes, power is technically restored to the neighborhood, but the breaker controlling smoke alarms may have tripped. Locate the panel, identify the relevant circuit, and toggle the switch fully off and then on. This ensures the alarm receives consistent AC power, reducing reliance on the backup battery. Confirming the circuit’s proper function is an essential step for maintaining safe, effective operation during and after power fluctuations.
Simple Safety Tips You Can Use
- Test alarms monthly using the test button.
- Replace batteries annually or as recommended.
- Check manufacture dates; most units need full replacement after 10 years.
- Keep spare batteries accessible for emergencies.
- Clean vents regularly to prevent dust buildup.
These steps help maintain reliable performance while reducing unnecessary alerts.
Common Mistakes to Avoid
- Forgetting to reinstall batteries after silencing alarms.
- Ignoring the chirp, which may fully drain the backup battery.
- Misidentifying the sound as another appliance, causing confusion.
- Covering or painting over the unit, obstructing sensor airflow.
- Using unsupported rechargeable batteries, which may trigger premature alerts.
Awareness of these issues helps ensure safe and proper maintenance.
Frequently Asked Questions
Why does the alarm chirp only at night?
Temperature changes overnight can reduce battery output slightly. A borderline low battery may trigger the low-voltage warning when the house cools down. Once daytime temperatures rise, the voltage can recover temporarily. This cycle indicates the battery is near the end of its useful life and should be replaced promptly to maintain continuous monitoring.
How long will a backup battery last during an outage?
A fresh alkaline battery can power an alarm for weeks or months in standby mode. Older or partially drained batteries may only last a few hours under full load. Regular annual replacement ensures reliable performance during outages and reduces the likelihood of unwanted chirping.
Can I disconnect the alarm until power returns?
Disconnecting a unit is generally not advised. Removing the alarm disables your primary detection system, which could be risky if alternative light or heat sources are in use. If disconnection is unavoidable for maintenance, reconnect the unit immediately and ensure it functions properly.
What if I have no replacement batteries available?
If the backup battery is depleted and no fresh battery is available, cleaning or resetting may temporarily reduce false alerts. Some homeowners remove the unit to muffle the sound temporarily, but this creates an unmonitored area. Ensure the alarm is reinstalled and equipped with a fresh battery as soon as possible.
How can I differentiate smoke and CO alarm beeps?
Smoke alarm low-battery chirps are typically single short sounds every 30–60 seconds. Carbon monoxide alarms often emit a pattern of four quick beeps followed by a pause. Always check the device label and pattern to identify the alert correctly.
Conclusion
Understanding how to stop smoke alarm beeping during power outage situations allows you to manage your home environment calmly and effectively. By identifying the source, checking the battery, cleaning the sensor, performing a reset, and ensuring proper power supply, you can silence unnecessary alerts while maintaining continuous protection. These devices are designed to support your safety, and using them responsibly ensures both peace of mind and reliable monitoring. With a little preparation and patience, handling smoke alarm chirping during power interruptions becomes a straightforward and stress-free task.
