
Ensuring your home remains secure is a comforting priority, and a Yale smart lock plays a crucial role in providing peace of mind. These modern locks combine convenience and technology, offering features like keypad entry, one-touch locking, and smartphone integration. However, like all electronic devices, they rely on a reliable power source to function consistently. When the low-battery indicator illuminates or you hear an alert, it’s simply a gentle signal that your lock needs fresh batteries.

Knowing how to change Yale lock batteries is a straightforward, routine task that helps maintain uninterrupted operation. This guide will walk you through the process with calm, clear instructions, allowing you to manage your smart lock’s power supply efficiently. By understanding the process, you can ensure your home remains protected while keeping the lock functioning smoothly without unnecessary worry or disruption.
What Changing Yale Lock Batteries Means
Changing the batteries in a Yale smart lock is a simple maintenance step that keeps the lock’s electronic components operating reliably. It involves removing the old batteries from the interior compartment and installing a fresh set, providing power to the keypad, motor, and other features. This task is designed to be user-friendly, requiring minimal tools or technical expertise. Performing this maintenance regularly helps ensure the lock functions smoothly, allowing seamless access and continued protection for your home. Treating this as a routine part of your smart home upkeep can help prevent minor disruptions and maintain overall reliability.
Preparing to Replace the Batteries
Before beginning the battery replacement, it’s helpful to prepare your workspace and gather necessary materials. Taking a calm, organized approach makes the process faster and reduces the chance of misplacing small components. Familiarize yourself with the interior battery compartment, note the orientation of the existing batteries, and ensure you have a comfortable space to work. By preparing in advance, you create an efficient routine that supports proper usage and safety measures. This step also allows you to maintain better protection for both the lock and its internal electronics during the swap.

Why Replacing Yale Lock Batteries is Important
Regularly replacing the batteries in your Yale lock ensures it operates consistently and reliably. Fully powered batteries allow features like keypad entry, one-touch locking, and app-based access to function without interruption. Low or drained batteries can prevent the motor from turning the deadbolt or the keypad from lighting, potentially leading to temporary access challenges. Updating the batteries proactively supports better protection of your home and provides peace of mind. This preventive measure is simple yet crucial for maintaining reliable operation and preserving the overall lifespan of your smart lock.
Common Situations You Should Be Aware Of
Several factors can lead to battery depletion in a Yale lock. Daily usage gradually consumes energy, while features like auto-locking, prolonged keypad illumination, or frequent app commands increase battery demand. Environmental conditions, such as extreme heat or cold, can also shorten battery life. Being aware of these situations helps you anticipate when the lock may require new batteries and ensures uninterrupted operation. Understanding these factors allows for better preparation, avoiding minor inconveniences and keeping your smart lock performing at its best.
Tools and Materials You’ll Need
- Four high-quality AA alkaline batteries (avoid rechargeable or lithium unless specified by the manufacturer)
- A small Phillips-head screwdriver
- A clean, dry cloth to wipe battery contacts
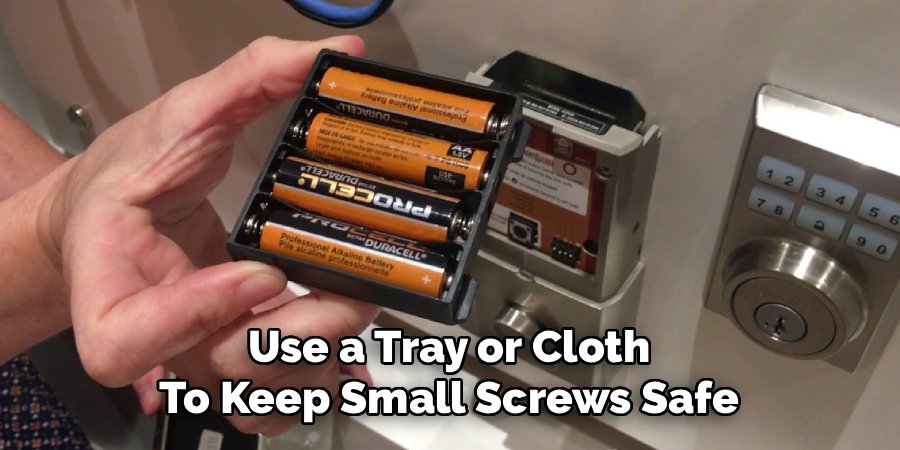
- A small tray or container for screws
Step‑by-Step Guide: How to Change Yale Lock Batteries
Step 1: Remove the Battery Cover
Start by accessing the interior battery compartment on the side of the lock inside your home. Ensure the door is stable so it won’t swing unexpectedly during the process. Use a tray or cloth to keep small screws safe. Locate the top screw holding the cover in place and turn it counter-clockwise with your Phillips-head screwdriver until it loosens. Slide the cover upwards to remove it from the lock. Handling the components carefully helps protect the screw and plastic cover, ensuring smooth reassembly later. Proper usage at this stage prevents any unnecessary stress on the lock components.
Step 2: Take Out the Old Batteries
Observe the orientation of the current batteries before removal, noting the positive (+) and negative (-) ends. Gently remove all four AA batteries, taking care not to damage the metal contacts. If any batteries feel stuck, use a non-metallic object to ease them out without applying excessive force. Take this opportunity to wipe the compartment and contacts with a dry cloth, removing dust or minor residue. This small precaution enhances connectivity and ensures your new batteries perform efficiently, providing consistent power for the lock’s keypad, motor, and other functions.
Step 3: Insert the New Batteries
Install four fresh AA alkaline batteries, ideally from the same package to ensure consistent performance. Align each battery with the marked orientation inside the compartment and press them firmly until they sit securely in place. Using all new batteries helps prevent uneven energy distribution and maintains optimal lock operation. Ensuring correct placement supports the motor, keypad, and other electronic functions, allowing your Yale lock to operate reliably while offering better protection for the home’s entry point.
Step 4: Test the Lock and Replace the Cover
Once the new batteries are installed, check the lock’s operation by pressing the keypad and entering your PIN. The deadbolt should extend and retract smoothly, and the keypad should illuminate without delay. Confirming functionality before replacing the cover ensures everything is working properly. Slide the cover back over the compartment and reinsert the screw, tightening gently to secure it without over-torquing. This step preserves the integrity of the lock housing while maintaining protection for the battery compartment and internal electronics.
Step 5: Monitor Battery Performance
After completing the swap, observe the lock over the next few days to ensure consistent operation. Check keypad responsiveness and deadbolt movement. Being attentive to small indicators of performance helps maintain long-term reliability. Routine monitoring supports smooth operation, extending battery life and providing confidence that your Yale lock continues to deliver safe, uninterrupted access.
Simple Safety Tips You Can Use
Always use recommended batteries, replacing all four at once for balanced performance. Store spares in a cool, dry location. Regularly check for low-battery alerts and address them promptly. Avoid using metallic tools inside the compartment that could create short circuits. These precautions support safe, preventive maintenance, ensuring reliable lock operation over time.

How to Stay Safe in Everyday Situations
Ensure family members understand how to recognize low-battery alerts and operate the lock responsibly. Keep the surrounding area well-lit to support safe keypad use at night. Maintain clear access around the lock, and review battery and performance regularly. Teaching responsible usage fosters security awareness and helps the household maintain smooth, reliable access for everyone.
Common Mistakes to Avoid
Common mistakes include using incorrect battery types, mixing old and new batteries, and ignoring low-battery warnings. Each can reduce performance or cause operational issues. Following the manufacturer’s recommendations and addressing alerts promptly helps maintain consistent reliability and avoids minor inconveniences or interruptions in lock function.
Frequently Asked Questions
How do I know when my Yale lock batteries are low?
Yale locks provide multiple indicators for low battery levels. Visual alerts on the keypad, flashing icons, or a red light may appear. Audible notifications are also common, providing distinct sounds separate from normal operation. For locks connected to the Yale Access app, a smartphone notification may alert you as well. These warnings typically begin when 20–25% of battery life remains, allowing sufficient time to replace the batteries before the lock’s electronic functions are interrupted. Monitoring these indicators ensures continued smooth operation.
What kind of batteries should I use for my Yale lock?
For optimal performance, always use four brand-new AA alkaline batteries. Using batteries from the same brand and package ensures consistent energy delivery. Avoid rechargeable (NiMH or NiCd), lithium, or zinc-carbon batteries unless specifically approved for your model. Using the recommended type preserves reliable keypad illumination, motor function, and overall lock operation. Refer to your lock’s user manual for any model-specific requirements to guarantee correct battery usage.
What happens if the batteries in my Yale lock die completely?
If batteries fully drain, electronic features like keypad entry and motor operation will stop. The lock may not respond to PIN codes or smartphone commands. However, Yale locks typically include backup access methods. Models with keyholes can be opened with a mechanical key. For keyless models, a 9V battery can temporarily power the lock, enabling access. Understanding these alternatives ensures you remain in control while restoring normal battery-powered operation.
How often will I need to change the batteries?
Battery lifespan varies with usage, features, and environmental conditions. Typical AA alkaline batteries last 6–12 months. High-traffic doors, extended keypad illumination, and auto-lock features increase energy use. Extreme temperatures can also reduce battery life. Monitoring low-battery indicators regularly ensures timely replacement, maintaining consistent performance, and uninterrupted access.
Can I change the batteries from the outside?
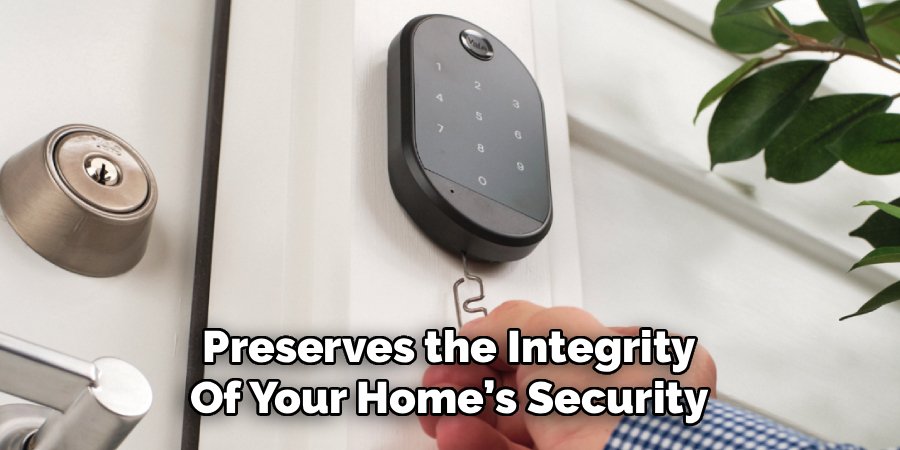
No, the battery compartment is located on the interior side of the lock for security reasons. This prevents unauthorized tampering from outside the door. To replace the batteries, you must access the interior assembly. If the lock fails while you are outside, use a mechanical key or 9V battery backup to enter before swapping batteries. This design provides enhanced protection and preserves the integrity of your home’s security.
Conclusion
Learning how to change Yale lock batteries is a straightforward and essential part of smart home maintenance. By following these simple steps, you maintain reliable operation, ensuring your lock continues to function efficiently while providing peace of mind for your home and family. This routine task supports consistent keypad and motor performance, reinforcing safe and dependable access. Embracing these preventive measures encourages a proactive approach to home security, helping your Yale lock remain fully powered and ready whenever you need it.
